In this section:
- An overview of the registry CMS interface
Before we begin
Make sure that your SilverStripe installation has the Registry module installed.
This module provides a page type that you can use to display a data registry on your website.
Registry
SilverStripe CMS websites can publish data held in their databases for users to access (alongside traditional web pages). For example, you might publish a database of all of the schools in the country, or a registry of people holding a qualification, so that website visitors can find information they seek.
The built-in features:
- a public search form
- see data summarised in a list, and drill into detail on an item by item basis.
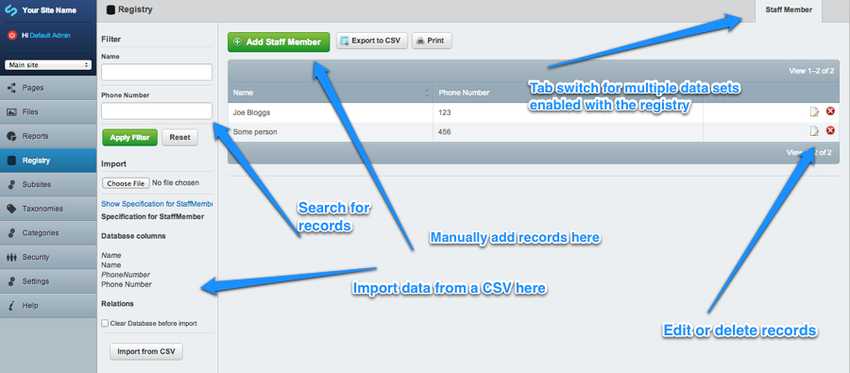
- export to CSV (and RESTFul API)
- CMS Administrators can bulk upload data via CSV or edit items one by one using an online form
A website developer is needed initially to create the “database” that can then be readily managed and interacted with using the CMS.
Adminstration of registry data
Pictured above is a summary of the admin area for managing registry data.
Adding a registry page
To share a set of registry data publicly on your website:
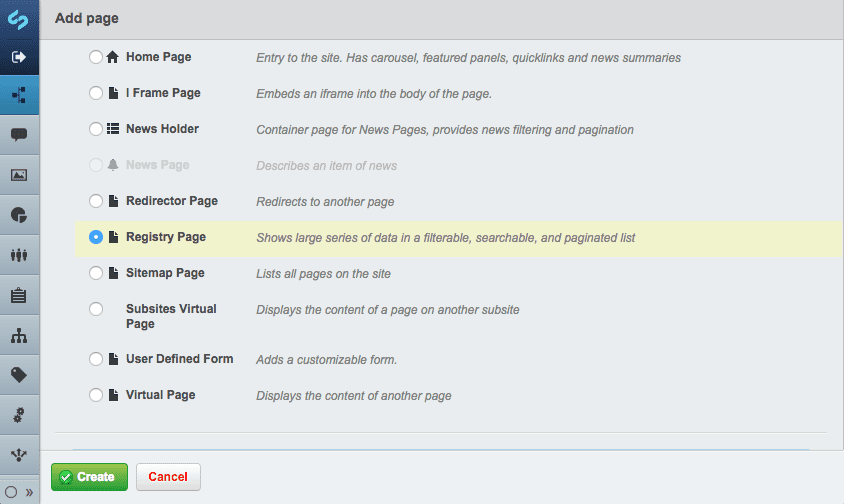
- In the
Pagessection of the CMS click "Add new" then select "Registry Page" - Name your page and select from the dropdown "Data Class" the set of data to make public (the set has to have previously been enabled by a web developer).
- Set the number of items to display per page and then publish your page.
- The data set will now be available and searchable on your website.

