Working with images and documents#
Uploading images to the CMS from the Files Menu.#
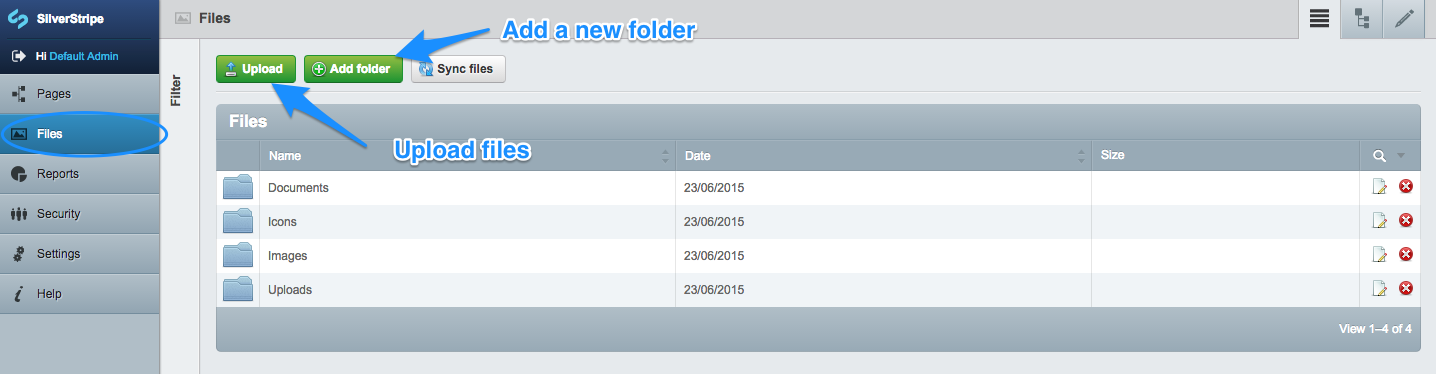
To upload images to the CMS, head to "Files" in the Navigation on the left side of the page. (Be sure to save any page you are working on in the editing page to a draft before doing so, otherwise you may lose any changes you have made since the last save).
You should see a list of all of the files (and folders containing files) that have been uploaded to the CMS, where the Editing pane would normally be. Before you upload your images/files, create a new folder (See the section below on Managing Files) to put your images in or click on the folder you would like the images to be uploaded to. To upload a file or image, click on the "Upload" button located above the list of files. This will take you to the upload files pane.
From the upload files page, click on the "Choose File(s) to upload" button to choose your first file to upload or drag your files into the "Drop Area" (this will automatically start the upload).
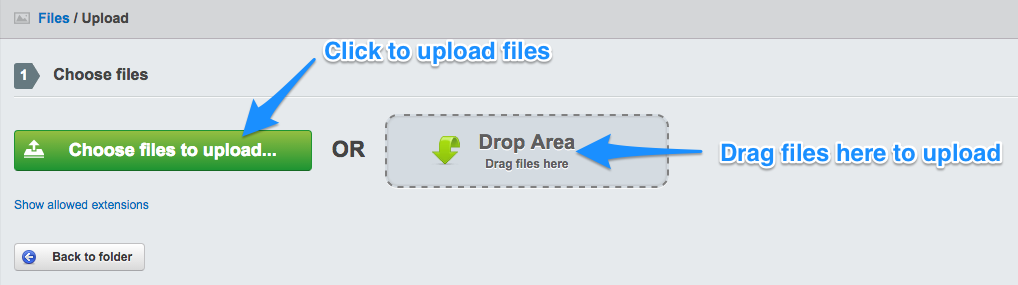
Repeat this process for every file you wish to upload or you can select multiple images/files to upload by holding "control" (Windows) or "command" (Mac) on the keyboard while clicking your chosen images/files.
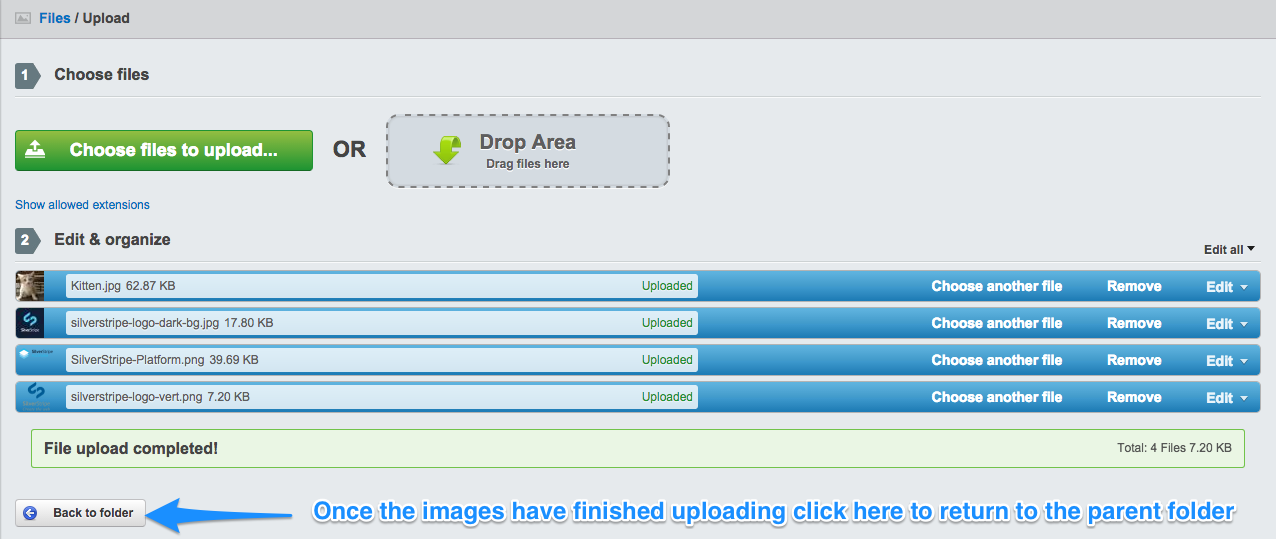
Once the images have finished uploading, click the "Back to folder" button to go back to the parent folder. You should now see the files you uploaded within your chosen folder.
[note] This same process can be used for filetypes other than images as well, which we will cover in Linking documents. [/note]
Inserting uploaded images#
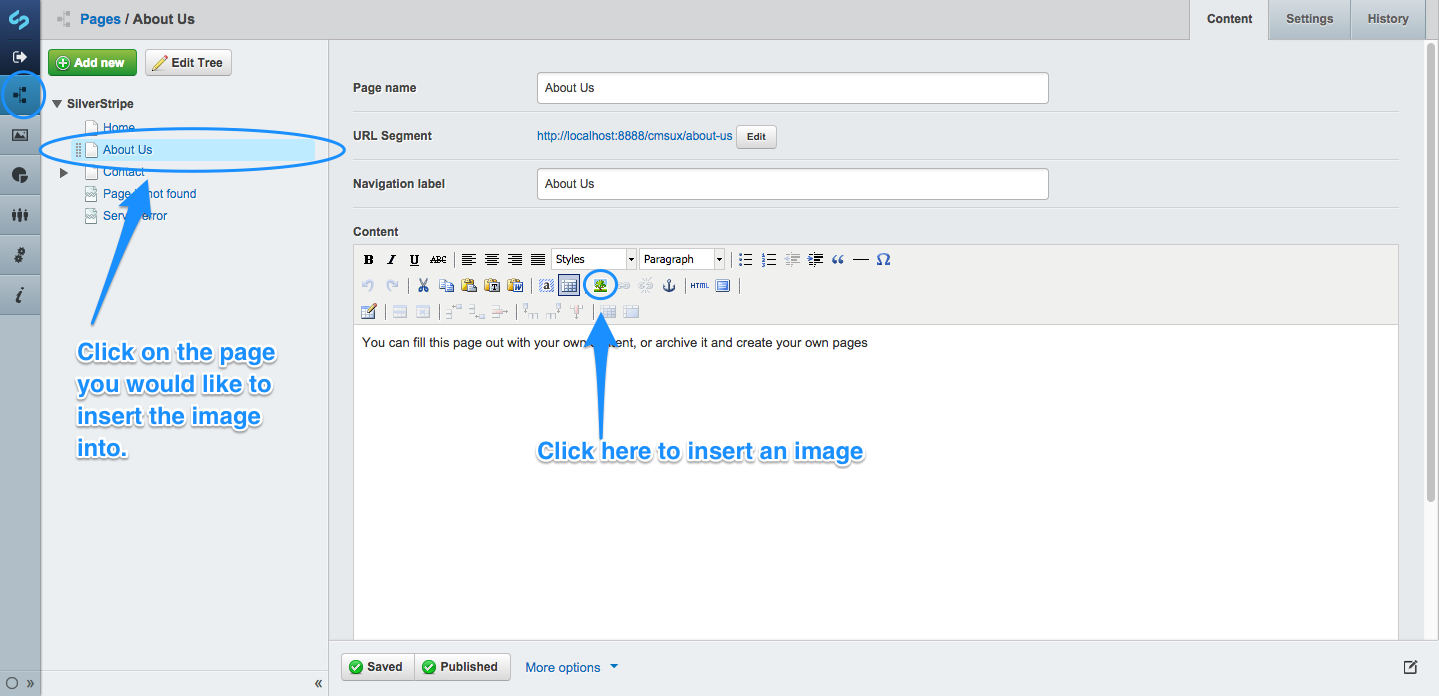
Once you have uploaded an image, you can insert it into any page. Make sure the page you want to add the image to is in the Editing Pane, then click on the "Insert Images" button.
This should bring up the insert image pop up. Click on the "From the CMS" tab and you should see a list of files. If you do not see the image you want, it may be in another folder. You can choose which folder you would like to view by clicking on the "Folder" drop-down box above the list of files. Additionally, you can use the provided search box to search by the image's filename.
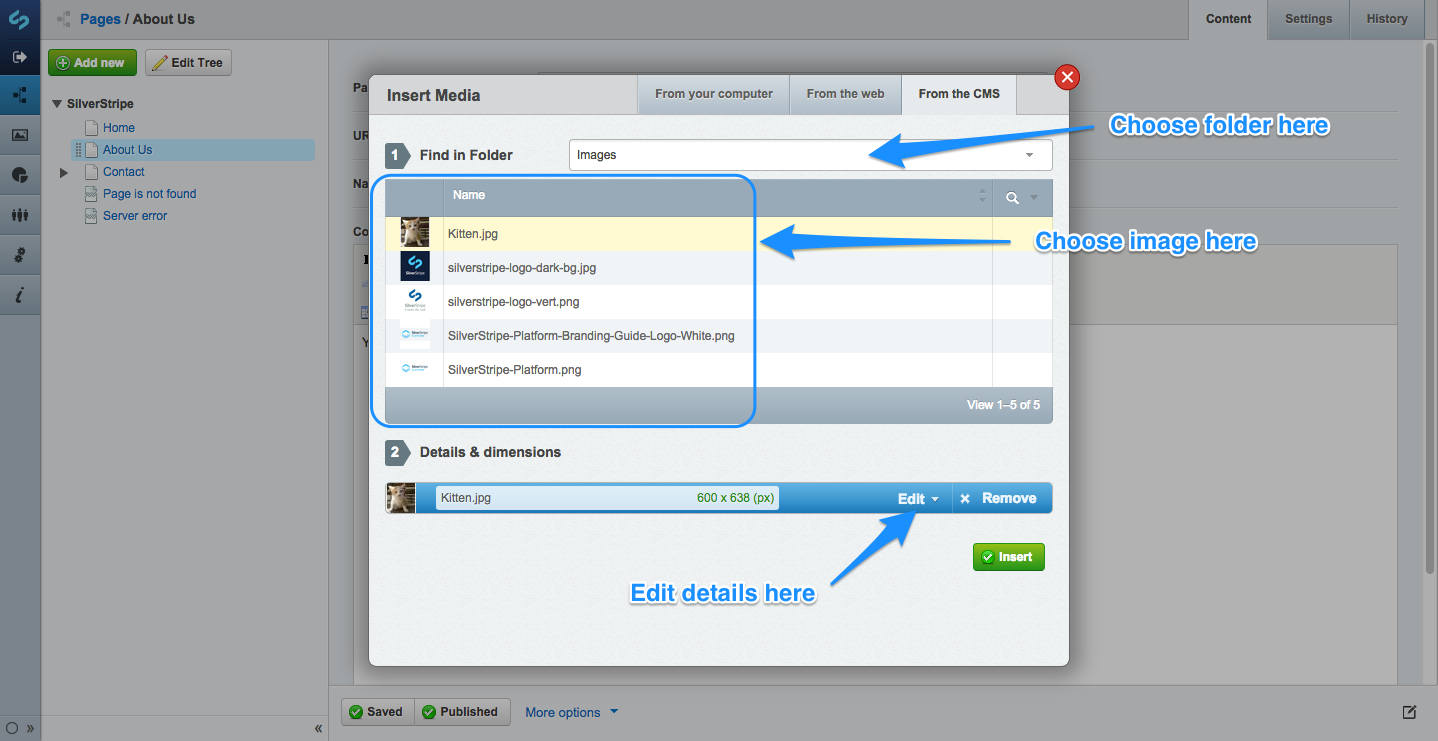
When you see the image you want, click on the image to select it. You can now edit the details of the image by clicking on the edit button. Here you can then add alternative text, which is shown if the image cannot be displayed (for example, on text-only web browsers, or screen readers for the blind) and title text, which shows additional information about the image when the mouse rolls over the image. If you wish to add a caption, you can do so. You can also choose the alignment and text wrapping properties of the image as well as the dimensions of the image to be displayed in the site.
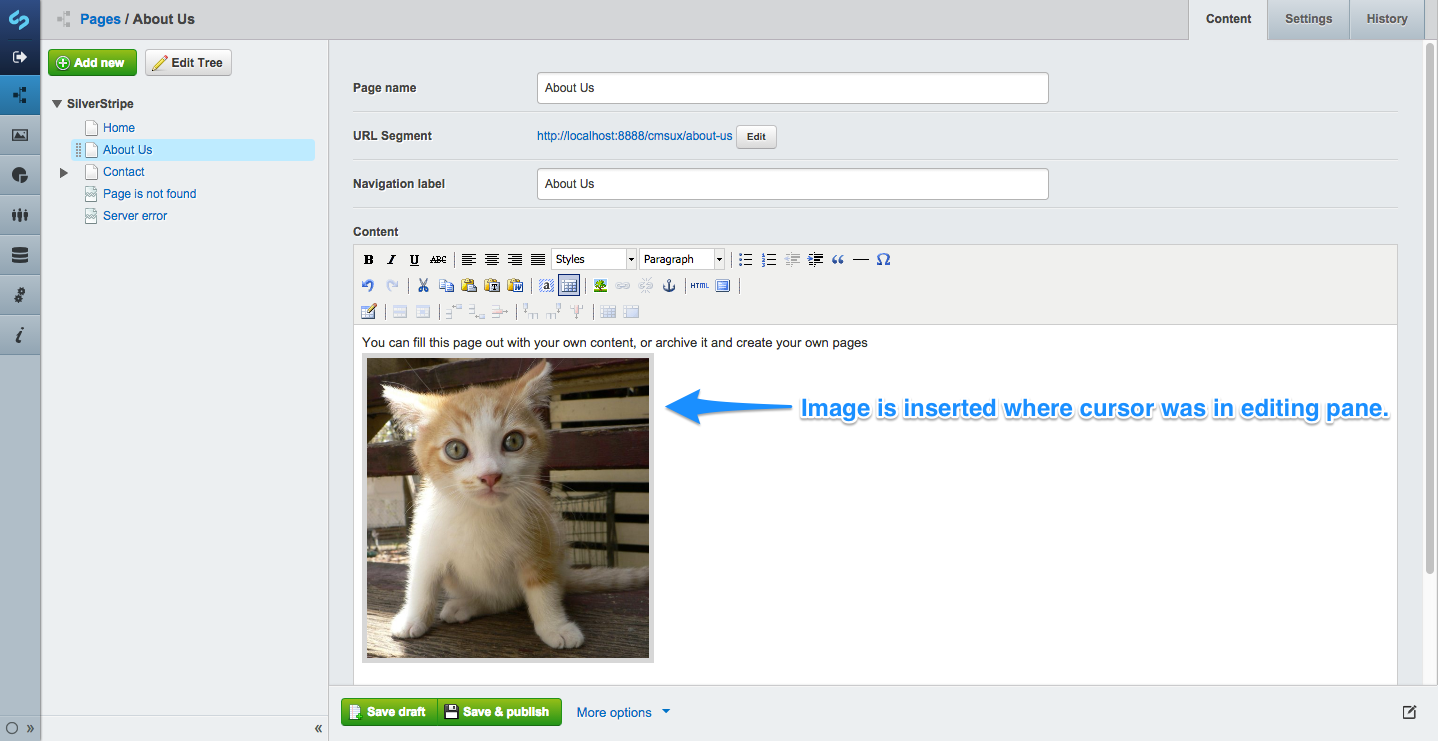
When you are done entering this information, hit the "Update" button on the bottom right of the Insert Images popup. This will place the image in your text where your cursor was in the editing pane.
Managing files#
To manage your uploaded files, head to "Files" in the Navigation on the left side of the page. The main CMS pane will now show a list of the directories that hold files in your website. This includes both images and documents such as PDF files, and can also include javascript files.
Creating, moving, and deleting folders#
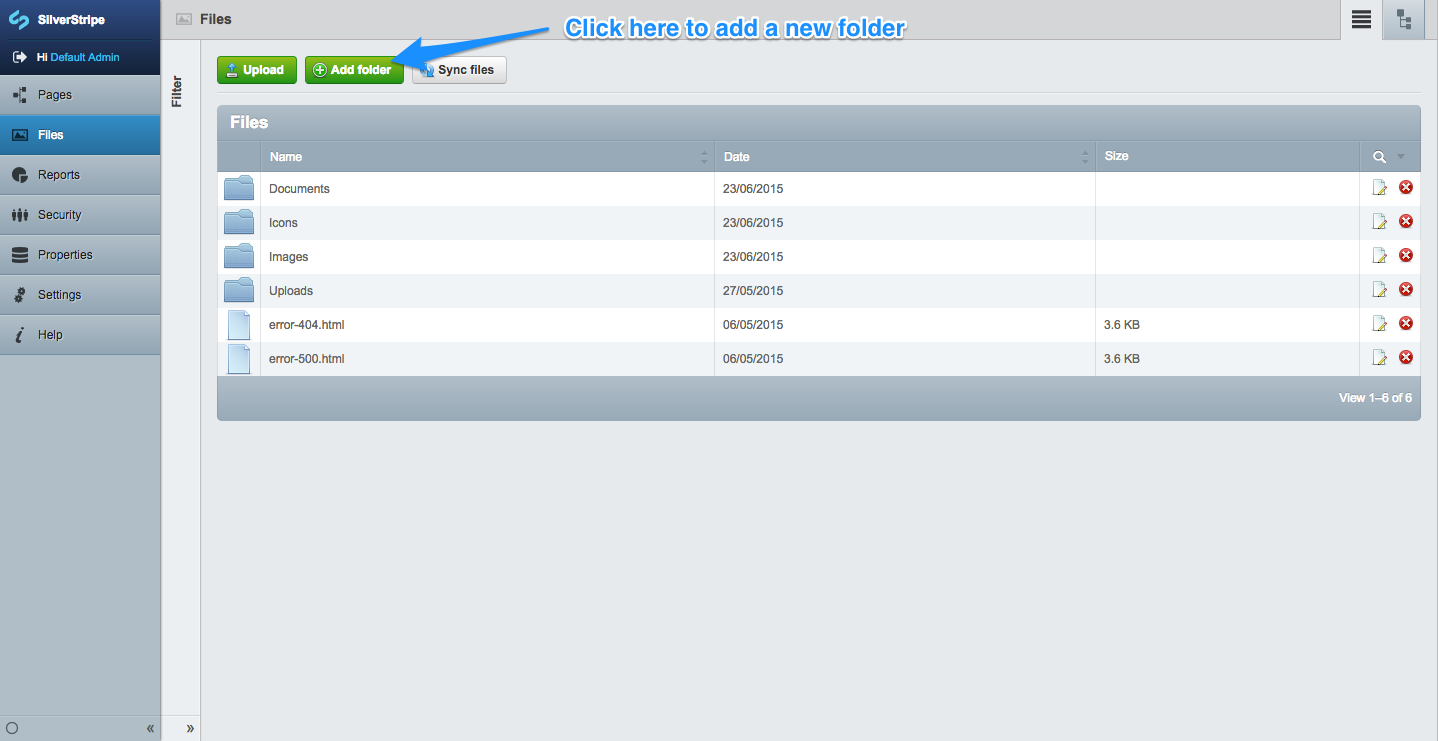
You can create new folders to store images and documents by clicking on the "Add folder" button on the top of the Files Pane. The newly created folder will be placed in whatever folder you are currently viewing.
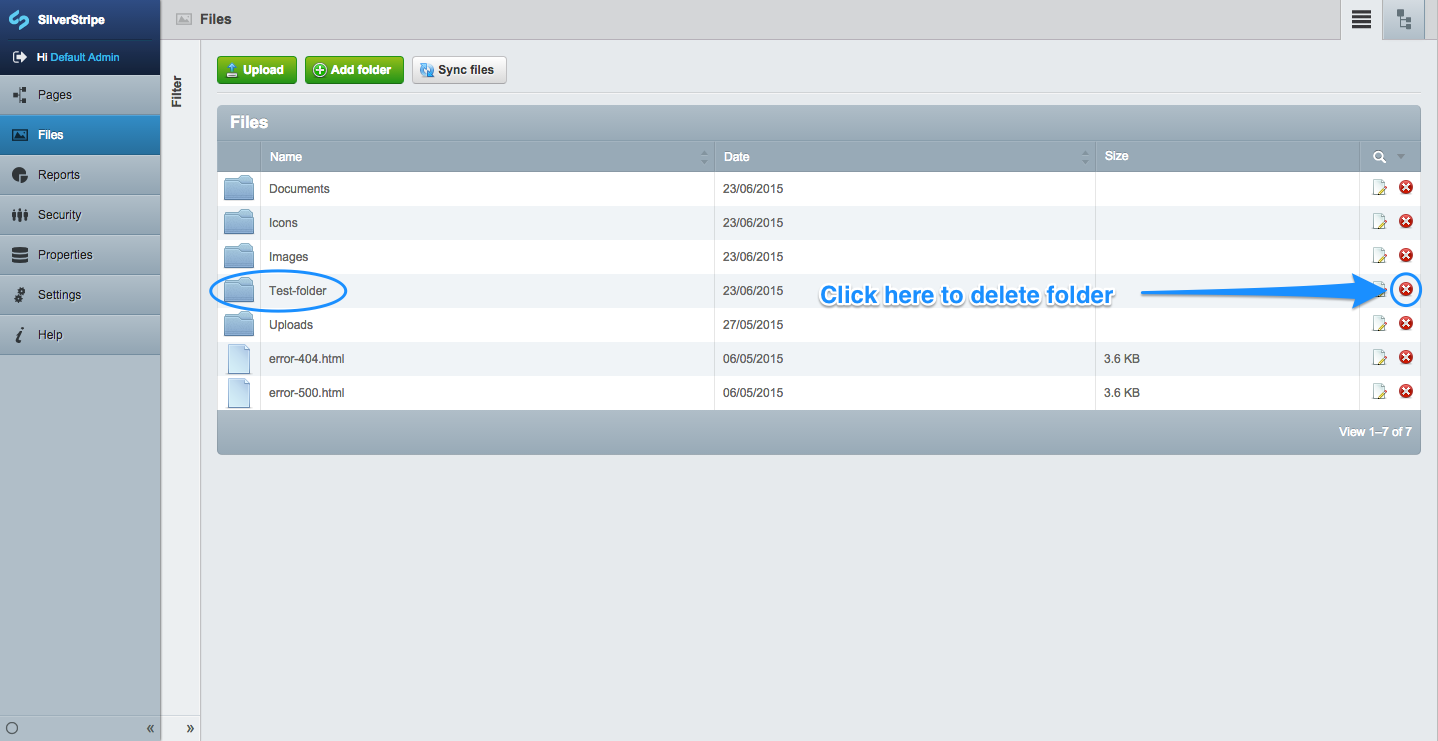
To delete a folder, click on the the delete icon in the actions column to the right of the folder listing. This will bring up a browser dialog box saying "Do you really want to delete this folder and all contained files?" Click yes to delete the folder.
Searching for images and documents#
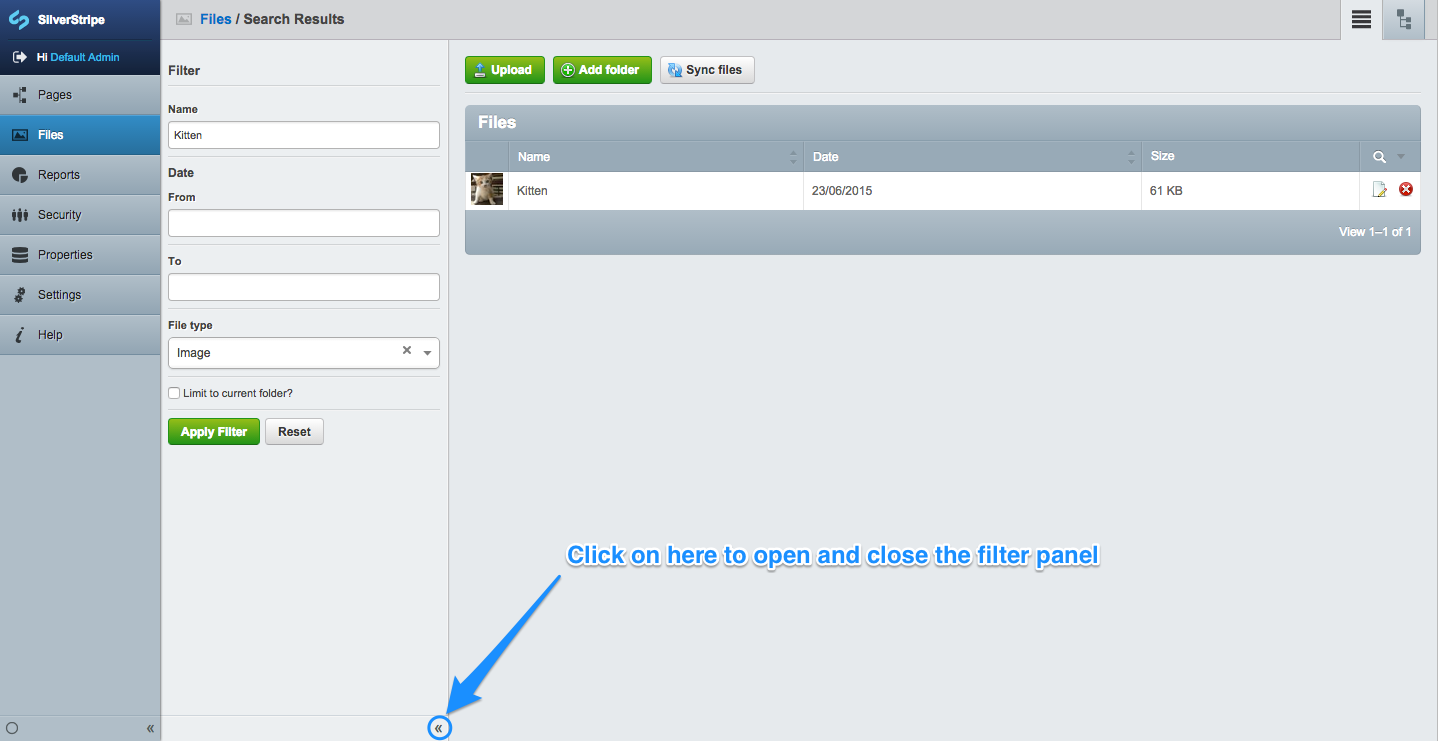
To search for an image, type the whole or partial filename in the "Search" field in the Filters panel. The filter panel is situated to the left of the Files pane. By default it is closed. To open and close the panel click the arrows at its base.
Moving, deleting, renaming images and documents#
Locate the file you wish to edit, (you may need to use the search filter if there are a large number of images in the folder). To edit the location or details of a document, click the edit icon in the actions column to the right of the file listing. This will bring up the file details pane. If you wish to delete a file, simply click the delete icon in the actions column to the right of the file listing.

Once you have opened the File details pane, and you can edit the files details and move the file to a new location by choosing a new parent folder from the folder dropdown. Hit "Save" at the bottom left of the pane when you are done editing.
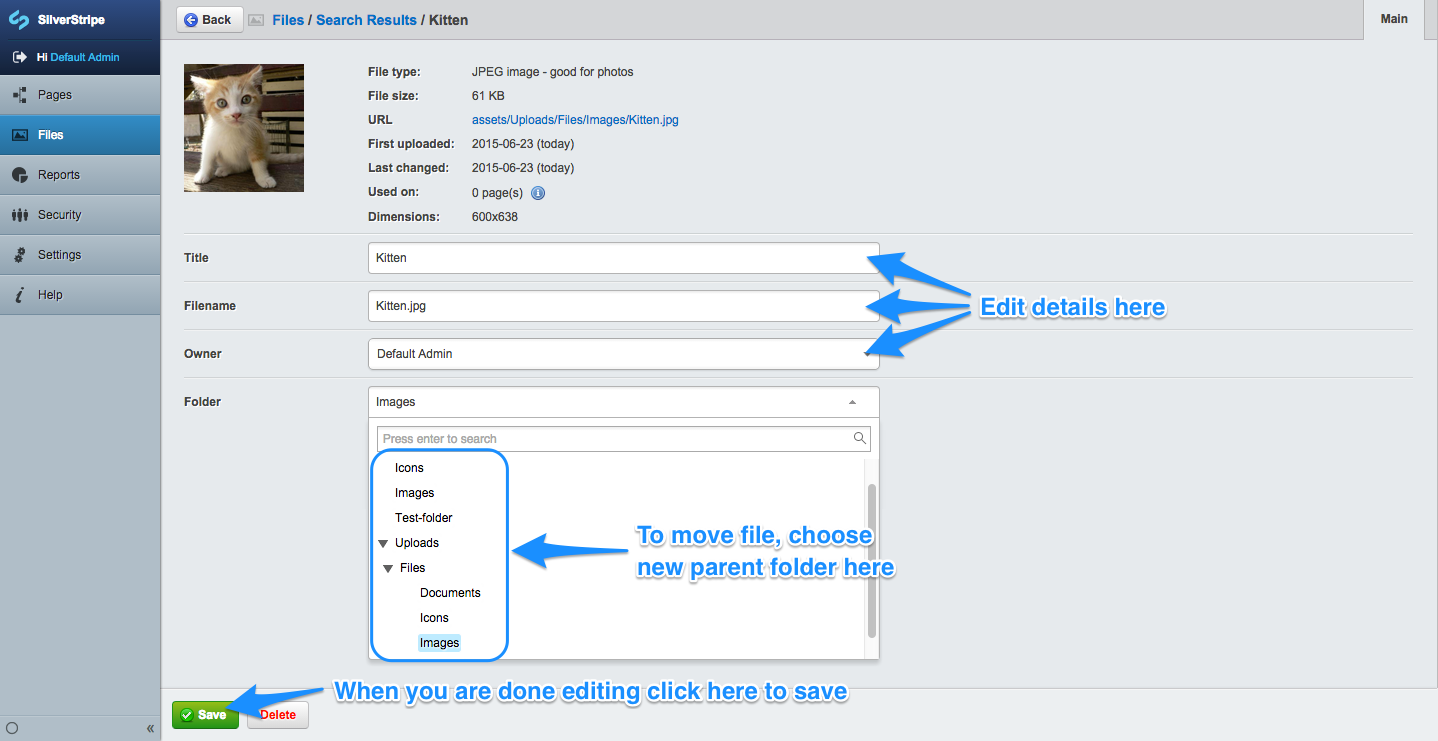
You can also delete the file from here too. To do this click the delete button which is located next to save at the bottom of the pane.
[note] By default, uploaded files are placed in the "Uploads" directory.
If you place an image in a webpage, and later move or rename that image in "Files & Images," SilverStripe CMS will automatically keep track of those changes, so your webpage will remain unchanged - you don't even have to republish the page. [Editor's Note: Isn't that awesome?] [/note]